Monday, 30 April 2018

7 Pro Influencer Outreach Tips to Ensure You Get a Response Every Time

Getting ignored by influencers? Here are seven pro influencer outreach tips to ensure you get a response every time. Crush your next campaign!

Digital marketing is the most dominant segment of the contemporary marketing mix, with social media influencers representing a crucial part of that mix. If you establish a strong connection with influencers, you can expect some serious benefits.

  1. First of all, more people will see your content / product.
  2. Secondly, most of them will check out your website and increase your traffic.
  3. And thirdly, influencers will initiate online discussions about your work, increasing your professional authority among the target audience.

For instance, the direct-to-consumer mattress company Leesa established cooperation with micro-influencer Sleepopolis to make a mattress review. It’s a great example of how an unbiased online review can boost brand awareness among highly targeted audiences.

Comfy Bed

There are probably dozens of influencers in every niche, but you can divide them all into 2 different groups:

  • Content creators: These are mostly bloggers who continuously publish high-quality content to win over new followers.
  • Industry leaders: The other group belongs to professionals who proved their skills and expertise in real business.

Influencers know their value, so it’s often not that easy to reach out to these individuals. But if you can handle it properly, you can count on long-term benefits.

7 reasons why influencers are ignoring you:

Reaching out to influencers can go smoothly if you use the right approach and offer them great content or a great incentive. In such circumstances, influencers will be glad to share your posts because each one of them wants to publish more and more quality content. It’s a win-win situation as you also get to earn a bunch of new followers.

However, most content creators are still facing rejections more often than not. If you feel like being part of this group, you should ask yourself – what am I doing wrong? How come they don’t pay attention to my magnificent product or content?

Let’s say you are sure that your content is great, so the problem must lie somewhere else.

Here are the most common reasons why you are getting ignored by influencers and tips on how to get a response every time.

checking instagram

1. You’re not personalizing your outreach

Most content creators seem to create an outreach template (eg. email or direct message) and follow the “one for all” logic. But this couldn’t be more wrong.

This system is indeed faster, but it’s not saying anything specific in relation to social influencers. This is the turning point because skilled influencers always notice when you are selling content to everyone.

QUICK FIX:

Don’t hurry and take some time to analyze each influencer individually. Here’s what Ruby Smith, a digital marketing expert at Best Essays, told us about this:

“You should explain why you admire his/her work and what makes this person stand out from the crowd of competitors. At the same time, you should offer your own piece of content that really matches the style and interests of the targeted influencer”.

Doing so, you will prove that this person really means a lot to you. You show respect and appreciation for the work of the influencer, which is the strongest foundation for mutual cooperation.

2. You’re not selling yourself properly

Social influencers receive tons of outreach messages, which is a problem for people who try to get closer to them. Besides that, influencers do a lot of their own work and it’s not hard to miss your email. You need to make an immediate impression in order to approach the influencer.

QUICK FIX:

Write a kickass outreach email and use that as your secret weapon in your influencer marketing strategy. This is what you need to do:

  • Write an attention-grabbing headline and don’t make it sound generic or boring
  • Write short and concise messages. Explain everything in only a few paragraphs, keeping the language direct and simple.
  • Answer the 5W + H questions. Let the influencer know Who does What, Where, When, Why and How. This should take no more than a few sentences, but the receiver will figure out everything.

The key point is to explain things briefly. Write why you are the perfect match for this influencer and you won’t be ignored.

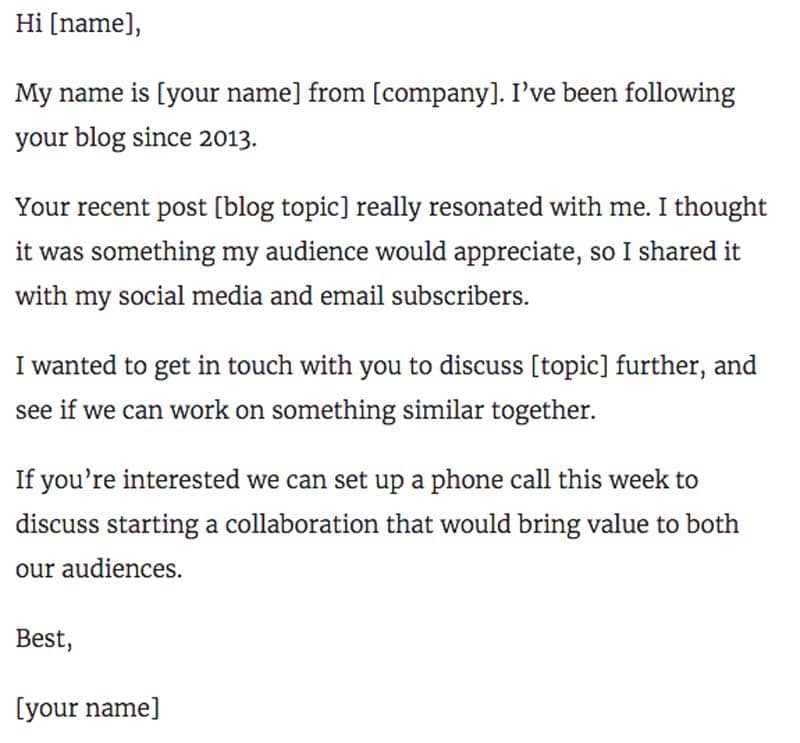
Below is one such template to consider:

Influencer Outreach Email Template

3. You’re not looking for influencers in the right places

You probably know your niche very well, however, that doesn’t mean that you know all the influencers who could be appropriate for your your product or content. Depending on your budget, aiming for the big boys is not always the best way forward, start small, then go big! 

When you reach out to wrong people, you are wasting both their time and your own time. For this reason, you should try to approach only those influencers who have a direct interest in your content.

QUICK FIX:

Find leaders in your industry who can really bring your product/content to the target audience. It’s not about the numbers – it’s about the quality of potential leads you receive through influencer marketing.

Do the research and look for influencers who nurture the same style and attract a similar target audience. Once you’ve done this, you can rest assured that influencers won’t ignore your outreach emails.

Smart Trike gives us a great example. The company wanted to approach mothers up to 40 years old who have around one year old babies. To do this, Smart Trike engaged with influential and well-known parents who were able to deliver this message to their peers. The result was outstanding – Smart Trike earned additional website traffic and increased conversion rates.

Instagram Influencer

4. You’re asking for too much and/or making it too hard for influencers

It would be perfect if an influencer could dedicate a substantial amount of time only to read, analyze, and make comments about your product or content. Unfortunately, this is almost never the case because influencers have a lot of things on their minds with or without you.

They need to create their own content, so additional tasks have to be very attractive if you want to convince them to pay attention. If you ask for too much from influencers, chances are you’ll end up being ignored.

QUICK FIX:

Your job is to take as much burden of the influencer’s back as possible. The easiest way is to ask for reposts or re-tweets. It takes nothing more than a few clicks, so it’s not a big deal.

But if you think that the full-time content analysis is necessary, you better draft your own version to save influencer’s time. If your posts are good, influencers won’t mind a little help from your side and you’ll both benefit from your effort.

5. You’re using the wrong channels

Emails and social networks are the most frequent communication tools, but there are lots of other channels to contact an influencer. If you can’t seem to get the answer to your proposal, perhaps you are using the wrong channel of communication.

Sometimes your email will be just one among hundreds of messages in the inbox, so influencers won’t notice you. The same goes for social media – in the abundance of private and business chats, your message could end up being lost forever. That’s why you need a different approach on some occasions.

QUICK FIX:

Serious influencers have websites with contact details. This channel serves for professional communication only, so they don’t forget to check it out and read the messages. On the other hand, influencers might be particularly be interested in one or two social networks, so you should conduct a little research to learn where they hang out the most.

In each case, the goal is to find a medium of communication that you know will increase the odds of reaching out to influencers successfully.

6. You’re not acting human

Live from Instagram

Social influencers are professionals like you and they know that what you are doing is business. However, that doesn’t mean that they are willing to accept every random guy who sends them a offer.

If your content and your messages look like an average spam email, influencers will notice that you treat them only as just another brick in the wall of digital marketing. And that, my friend, is not acceptable.

QUICK FIX:

Yes, it’s all about business. But that doesn’t mean that your communication should be boring and sterile. On the contrary, you should try to establish a stronger bond with each influencer and convince them to really invest time and efforts into mutual cooperation.

Act like a real human being and reveal your personality. After all, people prefer doing business with amusing and interesting people vs an alienated digital creature.

7. You forgot to include a CTA

With all you’ve seen so far, you might be a little confused. Reaching out to social influencers is difficult and time-consuming, which is exactly why content creators forget one important detail – to include calls to action to their outreach emails.

It goes like this – you send an article or request to the targeted influencers, they like your content, but don’t know what to do with it. The reason is simple – you didn’t tell them what to do after reading.

QUICK FIX:

You absolutely must include a CTA in your messages. Be honest and straightforward, but don’t be pushy. Just ask them to share your post in case they consider it interesting. Let your CTA button or link be catchy and stand out from the rest of the text, and let the influencers do the rest for you.

What do you think is the most important tactic to avoid getting ignored by influencers? Do you have some interesting experiences to share with our readers?

About the author: Warren is a marketing enthusiast and a blogger at Bestessays.com, who loves music. If he doesn’t have a guitar in his hands, he’s probably embracing new technologies and marketing techniques online! 

Sunday, 22 April 2018

10 Useful CSS Snippets Every Designer Should Have

This article was contributed by Rajeesh PK.

Designers and developers should always be looking out for tricks and hacks that help them develop their process in-line with browser support.

You can use some of these CSS snippets to automatically adjust the specifications of the columns in your table, wrap long text or even create a simple loading state without using GIFs.

1) Align anything vertically

This is one of the scenarios that designers who work with CSS face most often – we all wanted help with text alignment or element alignment vertically at least once! Using CSS3 Transforms, this can be easily sorted out.

Find the snippet provided below, which you can use the next time you are stuck.

.verticalcenter{

position: relative;

top: 50%;

-webkit-transform: translateY(-50%);

-o-transform: translateY(-50%);

transform: translateY(-50%);
}

With this, you can bring about a vertical alignment across boxes, single lines of text, paragraphs. And, you can easily find browser support for Firefox 3, Chrome 4, Opera 10, Internet Explorer 9 and Safari 3.

2) Stretch elements to fit into the full height of a window height

There might be scenarios when you would want to expand your components to fit into the exact height of your window. With the basic element resizing, you can resize to fit into the container size. But, if we want to resize a component to the size of a container’s full window height, then we need to start from the elements, such as html and body.

Here, is how to:

html,

body {

height: 100%;

}

Let us then apply 100% height to the specific component and:

div {

height: 100%;

}

3) Apply different styles to different file formats

Sometimes it is not easy to identify where a link is moving to, in such situations, you wish that that these different links would appear different from one another. Here you can find a snippet which will add icons to the link text and also insert icons above the link text. It will use a variety of icons or images for different sources.

a[href^="http://"]{

padding-right: 20px;

background: url(external.gif) no-repeat center right;

}

/* emails */

a[href^="mailto:"]{

padding-right: 20px;

background: url(email.png) no-repeat center right;

}


/* pdfs */

a[href$=".pdf"]{

padding-right: 20px;

background: url(pdf.png) no-repeat center right;

4) Grayscale images with cross browser support

If you want your website to appear more classic and even minimalistic, you can use Grayscale that will splatter a brighter and in-depth tone. Here is an example on how to apply grayscale filters to images using SVGs. Many of you might have already used this.

<svg xmlns="http://www.w3.org/2000/svg">

<filter id="grayscale">

<feColorMatrix type="matrix" values="0.3333 0.3333 0.3333 0 0 0.3333 0.3333 0.3333 0 0 0.3333 0.3333 0.3333 0 0 0 0 0 1 0"/>

</filter>

</svg>

If you want this to be rendered across cross browsers, use the ‘filter’ property as given below.

img {

filter: url(filters.svg#grayscale); /* Firefox 3.5+ */

filter: gray; /* IE6-9 */

-webkit-filter: grayscale(1); /* Google Chrome, Safari 6+ & Opera 15+ */

}

5) Animate backgrounds in gradient

Have you ever thought of a life without animations? It is difficult to imagine. So, let us find out how the animation feature of CSS can help you with this. It is believed that this gradient is one of the best that CSS offers. It is possible to animate the opacity, size, and background color with this, but it doesn’t offer gradient colors. Here is a snippet that will help you with this. The background position would be moved to bring about an animation effect.

button {

background-image: linear-gradient(#5187c4, #1c2f45);

background-size: auto 200%;

background-position: 0 100%;

transition: background-position 0.5s;

}

button:hover {

6) Auto width in table columns

The truth is that none of like playing with tables as they are not easy to deal with while trying to bring about adjustments across the widths of columns. Here, is a shortcut or snippet that will help you. By inserting ‘white-space:nowrap’ within the ‘tdelement’, you can bring about appropriateness in the text wrapping.

td {

white-space: nowrap;

}

7) Display box shadows on any side (one or two)

Here is an interesting snippet that will help you with box shadows on both, or either side of the box. If we want this to be done, the box and its related height and width need to be defined. You can give this shadow using the ‘:after’ pseudo component. Just ensure that it is placed in the right point. This is how bottom-only shadows are created.

.box-shadow {

background-color: #FF8020;

width: 160px;

height: 90px;

margin-top: -45px;

margin-left: -80px;

position: absolute;

top: 50%;

left: 50%;

}

.box-shadow:after {

content: "";

width: 150px;

height: 1px;

margin-top: 88px;

margin-left: -75px;

display: block;

}

8) Wrap text content that is too long

For texts that are longer than their containers, use this simple hack and it will get sorted with ease. The default mode will fill text horizontally, no matter what the width of the container is, as given in the example below:

You can use this snippet to get the text to fall within the width of the container or holder.

pre {

white-space: pre-line;

word-wrap: break-word;

}

Before:

Text Wrap Before

After:

Text Wrap After

9) Blur text in CSS

Do you want to blur your text? Use ‘text-shadow’ for this. All you have to do is use transparent color and then add the text-shadow as given below:

.blurry-text {

color: transparent;

text-shadow: 0 0 5px rgba(0,0,0,0.5);

}

10) Animate ellipsis

The below-given sample shows how you can use snippets to create an animation named as ellipsis, which will further help in generating loading states that are simple – all without using GIF images.

.loading:after {

overflow: hidden;

display: inline-block;

vertical-align: bottom;

animation: ellipsis 2s infinite;

content: "\2026"; /* ascii code for the ellipsis character */

}

@keyframes ellipsis {

from {

width: 2px;

}

to {

These are just some popular CSS snippets that you can use to bring about changes to your design. Along with CSS snippets, keep yourselves updated with popular CSS frameworks as they are in the constant state of improvement.

About the author: Rajeesh is a Director and Creative Head at Acodez, a leading web development company in India. 

Monday, 16 April 2018

How To Take Great Photos For Your Graphic Design Projects

This article was contributed by Michael Schacht.

For enthusiasts, photography is more than just a hobby. It can be a lucrative business, especially if you have the eye for taking gorgeous photographs and the talent for grabbing opportunities to take a great photo.

But before you turn your love for photography into a business, you need to practice and get set up with the goods.

Basic Photography Equipment

Before you start with photography, you need to have the right equipment to practice your skills, but you do not need to spend too much on equipment, especially if you are a beginner.

Here is the basic photography equipment you will need:

  • Camera

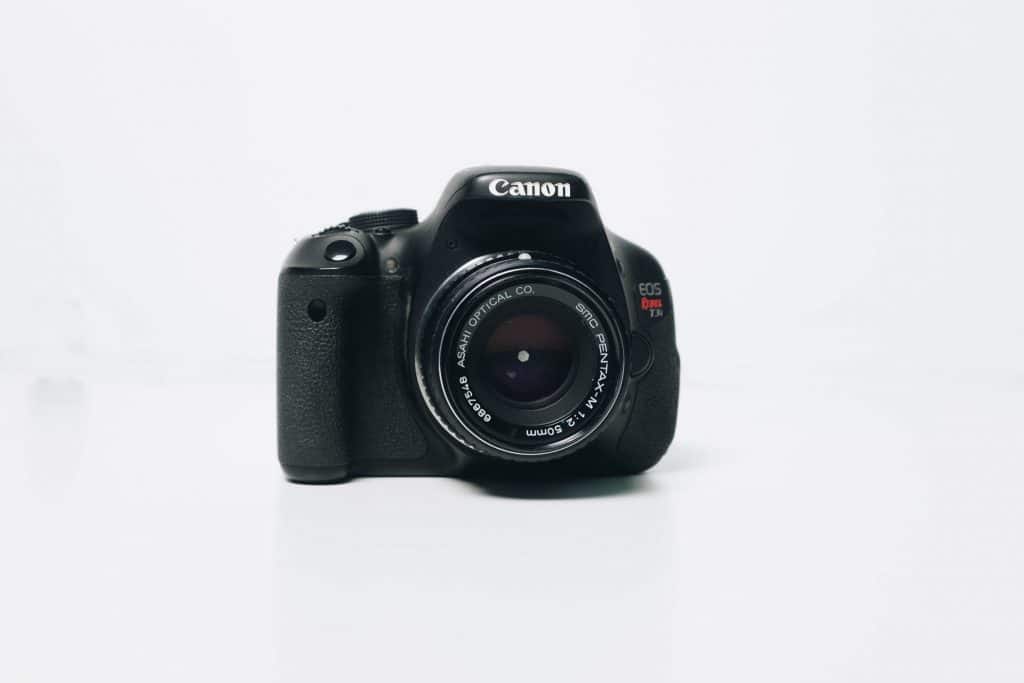
Canon Camera

When you start with photography, it helps to have a good camera. Nowadays, many cameras are available so you may find it difficult to choose only one. It is essential to pick one that you are comfortable with. You need to consider what type of photography you want to concentrate on because some camera models work better in certain situations than others. The Canon Rebel T7i with an 18-55mm kit lens is a great recommendation and is considered as one of the best cameras for those who are new to photography. See here for how to choose the right camera.

  • Lenses

Nikon Cameras

You can also practice shooting photographs with your lenses. Although most cameras include stock lenses, you may want to try and experiment with different lenses to achieve different photography styles. Lenses can be expensive; therefore, you must do your research before you purchase them. It is also important to consider the model of your camera when buying lenses. They should be compatible with your current model, so you don’t encounter problems regarding compatibility. The Nikon 50mm f/1.8D is one such lens that is ideal for taking photographs for graphic design projects because of its natural image representation features and its quality performance in every lighting condition.

  • Batteries

Cameras have limited battery lifespan; therefore, you need to have another set of spare batteries so you can continue practicing when out and about. Having another battery also allows you to take practice shots while you are mobile. You need to decide on which type of batteries work best for your camera. Alkaline batteries have a shorter lifespan, while lithium batteries can last longer and they can withstand cold weather. When it comes to rechargeable batteries, nickel-metal-hydride batteries work best. These batteries can last longer, have more power, and are environmentally friendly.

  • Memory card

If you are practicing your shots, you do not have enough time to delete the ones that you think are not good enough. Therefore, you need more memory space to store your photographs. Getting a large memory card for your camera is an ideal way to save time when practicing your test shots. You don’t have to stop from time to time just to delete pictures that do not pass your standards. The 128GB SD card from SanDisk memory card is recommendable.

  • Tripod

Tripods are beneficial if you want to achieve a more steady shot. You don’t have to purchase an expensive one since you are still starting your photography career. You can try to find cheaper ones such as Amazons Basics or second-hand models online. Some tripods are cheap and are ideal for photographers with a low budget. However, these tripods could wobble, which will affect the quality of your photographs.

  • Camera Bag

You need a good camera bag that can carry all your photography items. It must be big enough to fit your camera, lenses, batteries, and other equipment. Your camera bag must be durable and sturdy because you’re always on the move while you are practicing your photography skills.

  • Reflector

Reflectors can help you manipulate light when taking pictures. It can give your subjects more lighting, thus making them clearer. The light from reflectors are softer than the light from flash units. Plus, they’re easy to use and understand. You could try the Photoflex 32” 5-in-1 reflector.

  • Editing software

Photography Editing Studio

Lastly, you need good editing software to edit your photographs. If you have limited skills when it comes to editing, you can look for video tutorials online. As for software, you can try the Adobe Photography Plan (for Adobe Lightroom + Photoshop) or Phase One Capture One Pro 11, which are both compatible with a PC or a Mac.

Photography Video

If you’re looking to purchase basic photography equipment, you can get good advice from the Youtube channel of theslandtedlens.com. You can use the photography studio grade equipment on their list without having to shell out too much. Remember to purchase a camera, lenses, batteries, memory card, memory card reader, tripod, reflector, and editing software.

Shooting Great Photos for Graphic Design Projects

Graphic design is a form of art that communicates with an intended audience. It makes use of a variety of photographs, paintings, or illustration to create a piece that can convey a message to an audience. If you are planning on using your photos for your graphic design projects, you need to consider a few tips on how to shoot great photographs:

  • Theme

You need first to think of the theme of your project. What kind of mood does your client want? How will you shoot a photo based on your client’s chosen theme? You have to study the theme or mood to capture photographs that are related to the concept. You can brainstorm with your client and your team to come up with shots that can show the central concept of the project.

  • Subject

Who or what are you going to shoot? You can ask your client if he or she wants their primary product to be the subject of the shoot or if he or she prefers to add more elements to the subject. You need to consider your subject so you can determine what style of photography you’re going to use.

  • Audience

Who are you targeting? Who will see the project or campaign? You need to study your audience as well to know how you are going to direct your shoot. Is the project intended for the youth? Is it for a mature audience? You need to know who your client is targeting to be able to create a more compelling design or campaign. This way, your photographs can communicate well with your target audience.

  • Camera

Since you are shooting an official project, you need to use a camera that you are comfortable with. You need to be familiar with the camera so you can shoot the photographs with ease. Your camera should also have the right lenses for the type of shoot you are going to do. You also need to consider your camera’s memory and batteries. Bring extra sets of batteries during the shoot to avoid any problems with your batteries and storage.

  • Lighting

Natural light is always best when it comes to photography. However, there are instances when you need to consider artificial lighting to be able to get the right shot for your campaign. If you are using natural light, it is best to work in open areas where light enters freely. It allows you to take shots that are more organic and real.

  • Angle

You also need to work on the proper angles of your photoshoot. If you are working with models, you need to find their correct angles and concentrate there. Angles also create a dramatic effect whenever you are shooting. Try to experiment with a variety of angles until you can shoot the right photograph for your project.

Window photography

If you follow these tips, even with the most basic equipment, you’ll be able to come up with great shots that will “Wow” your audience. Remember to find the best fitting theme for your subject that your audience can easily relate to. Find your right angle and use the most natural lighting, and you can start clicking your cameras away.

Photography Points to Consider

Completing a photography project can be difficult. You need to impress your client and you need to communicate with your target audience. If you are working on your graphic design project, you can also consider these graphic design elements:

  • Background

Backgrounds can make or break an entire photograph. You need to choose a background that can make your objects pop. Your background must be able to add more depth to the picture.

  • Layout

Before you start with a graphic design project, you need to think of your layout first. You have to create one that looks clean and polished. You also need to plot all elements into your design to check if all of them fit together.

  • Colors

You also need to consider the colors that you are using. Without colors, your project can look dull and simple. Experiment with different shades and hues. However, you need to use the right combination of colors so your photos can pop out and your final piece can attract the intended audience.

  • Shapes

Shapes are also important elements of graphic design. They can help fill a space using different creative techniques. You can use shapes to support your piece’s content and to make important texts stand out.

  • Typeface

Lastly, you need to find the right typeface to match your entire project. Different typefaces help create a simple message into a beautiful artwork. You can choose large and bold fonts to highlight important points in your project. You can also mix and match different fonts.

Tripod Photography

A great image helps create a great graphic design. If you are a currently working on a graphic design project, you should first start with shooting a great photograph. High-resolution photos require minimal editing, making it easier for you to use it for any sort of graphic design project. Therefore, you must first shoot a photograph and work your way from there.

Michael Schacht is a portrait photographer and photography educator based in Chicago, Illinois. As owner/operator of 312 Elements Headshot Photography located in Chicago’s West Loop neighborhood, Michael overseas the day to day operations and has had the opportunity to photograph thousands of corporate professionals over the last decade.